我们可以用以下方式在Selenium Webdriver中capture video.
基本步骤
- 从Monte Screen Recorder,下载“MonteScreenRecorder.jar”
- 添加Jar包到你的selenium/webdriver eclipse project
利用“ScreenRecorder” 类创建一个capture对象方法,脚本如下所示:
1
2
3
4
5
6
7
8
9
10
11
12
13
14
15
16
17
18
19
20
21
22
//If we didn't name the folder, after execution test script,
//video file is generated under “Video” folder of current user folder in Windows machine
//and “Movies” folder on Mac machine.
public void startRecording() throws Exception
{
GraphicsConfiguration gc = GraphicsEnvironment
.getLocalGraphicsEnvironment()
.getDefaultScreenDevice()
.getDefaultConfiguration();
this.screenRecorder = new ScreenRecorder(gc,
new Format(MediaTypeKey, MediaType.FILE, MimeTypeKey, MIME_AVI),
new Format(MediaTypeKey, MediaType.VIDEO, EncodingKey, ENCODING_AVI_TECHSMITH_SCREEN_CAPTURE,
CompressorNameKey, ENCODING_AVI_TECHSMITH_SCREEN_CAPTURE,
DepthKey, 24, FrameRateKey, Rational.valueOf(15),
QualityKey, 1.0f,
KeyFrameIntervalKey, 15 * 60),
new Format(MediaTypeKey, MediaType.VIDEO, EncodingKey, "black",
FrameRateKey, Rational.valueOf(30)),
null);
this.screenRecorder.start();
}在测试脚本的开始处调用 “screenRecorder.start()” 方法,在结尾调用”screenRecorder.stop()”方法,脚本如下所示:
1
2
3
4
5
6
7
8
9
10
11
12
13
@Test
public void search() throws Exception
{
openBrowser();
startingRecording();
openURL();
BaiduSearch yy = new BaiduSearch(driver);
yy.searchFor("searchTest");
driver.quit();
stopRecording();
}
进阶应用
大多数情况下,我们都希望把录制的视频放到一个指定的目录下,
这时候你需要重写“ScreenRecorder”类的“createMovieFile”方法,脚本如下所示:
1
2
3
4
5
6
7
8
9
10
11
12
13
14
15
16
17
18
19
20
21
22
23
24
25
26
27
28
public class SpecializedScreenRecorder extends ScreenRecorder {
private String name;
public SpecializedScreenRecorder(GraphicsConfiguration cfg,
Rectangle captureArea, Format fileFormat, Format screenFormat,
Format mouseFormat, Format audioFormat, File movieFolder,
String name) throws IOException, AWTException {
super(cfg, captureArea, fileFormat, screenFormat, mouseFormat,
audioFormat, movieFolder);
this.name = name;
}
@Override
protected File createMovieFile(Format fileFormat) throws IOException {
if (!movieFolder.exists()) {
movieFolder.mkdirs();
} else if (!movieFolder.isDirectory()) {
throw new IOException("\"" + movieFolder + "\" is not a directory.");
}
SimpleDateFormat dateFormat = new SimpleDateFormat(
"yyyy-MM-dd HH.mm.ss");
return new File(movieFolder, name + "-" + dateFormat.format(new Date()) + "."
+ Registry.getInstance().getExtension(fileFormat));
}
}修改startingRecording方法
1
2
3
4
5
6
7
8
9
10
11
12
13
14
15
16
17
18
19
20
21
22
23
24
25
26
27
28
//Save video to desire location
public void startingRecording() throws Exception
{
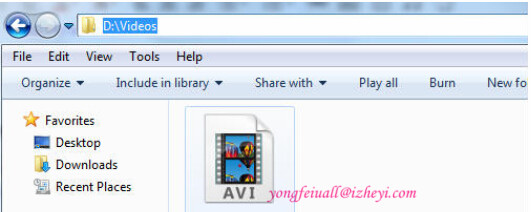
File file = new File("D:\\Videos");
Dimension screenSize = Toolkit.getDefaultToolkit().getScreenSize();
int width = screenSize.width;
int height = screenSize.height;
Rectangle captureSize = new Rectangle(0,0, width, height);
GraphicsConfiguration gc = GraphicsEnvironment
.getLocalGraphicsEnvironment()
.getDefaultScreenDevice()
.getDefaultConfiguration();
this.screenRecorder = new SpecializedScreenRecorder(gc, captureSize,
new Format(MediaTypeKey, MediaType.FILE, MimeTypeKey, MIME_AVI),
new Format(MediaTypeKey, MediaType.VIDEO, EncodingKey, ENCODING_AVI_TECHSMITH_SCREEN_CAPTURE,
CompressorNameKey, ENCODING_AVI_TECHSMITH_SCREEN_CAPTURE,
DepthKey, 24, FrameRateKey, Rational.valueOf(15),
QualityKey, 1.0f,
KeyFrameIntervalKey, 15 * 60),
new Format(MediaTypeKey, MediaType.VIDEO, EncodingKey, "black",
FrameRateKey, Rational.valueOf(30)),
null, file, "MyVideo");
this.screenRecorder.start();
}重新执行脚本,会在指定的路径下产生视频: