- Install
SonarQube Scannerplugin in Jenkins. - Global Configuration.
Log into Jenkins as an administrator and go toManage Jenkins > Global Tool Configuration: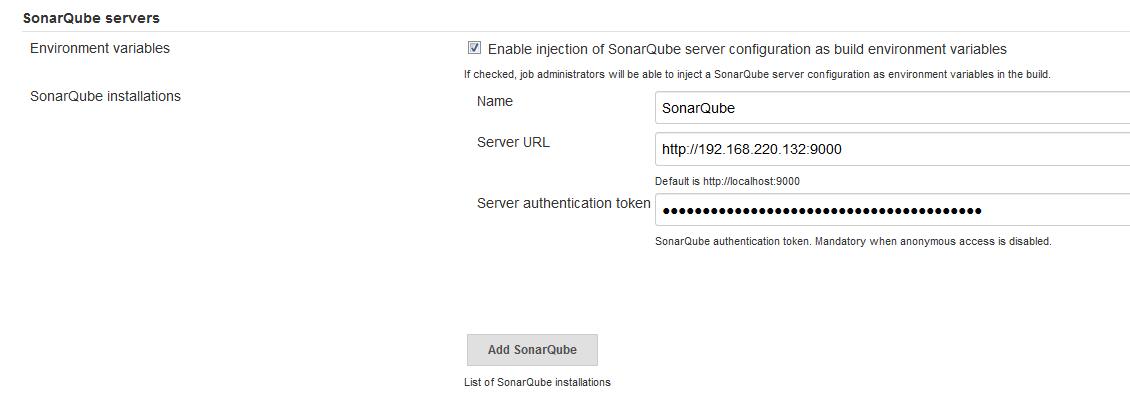
Create Pipeline job.
Add the below Pipeline script:1
2
3
4
5
6
7
8
9
10
11
12node {
def mvnHome
stage('SCM and configration') {
git 'https://github.com/yongfeiuall/spring-boot-example.git'
mvnHome = tool 'M3'
}
stage('SonarQube analysis') {
withSonarQubeEnv('SonarQube') {
sh "'${mvnHome}/bin/mvn' clean package sonar:sonar"
} // SonarQube taskId is automatically attached to the pipeline context
}
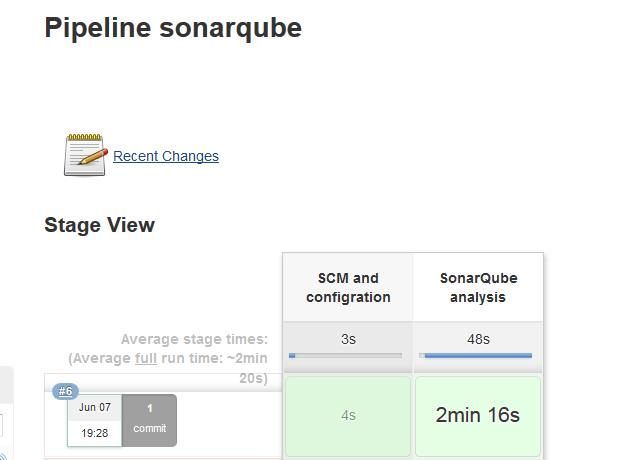
}Run job.

Code Analysis with SonarQube
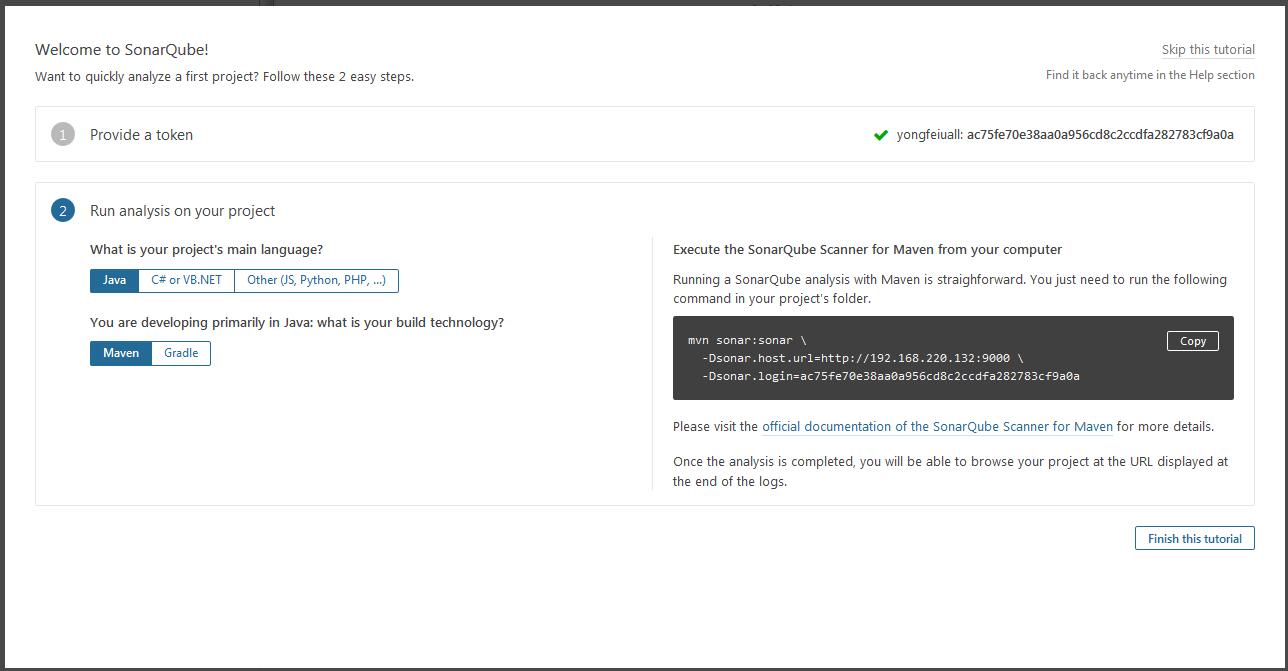
Login the sonarqube, create a token. Also need to select the primary language (Java) and the build technology of the project (Maven).
Add sonarqube maven plugin in project pom file
1
2
3
4
5<dependency>
<groupId>org.sonarsource.scanner.maven</groupId>
<artifactId>sonar-maven-plugin</artifactId>
<version>3.5.0.1254</version>
</dependency>Execute below command from the root of our project directory to scan
1
mvn sonar:sonar -Dsonar.host.url=http://192.168.220.132:9000 -Dsonar.login=ac75fe70e38aa0a956cd8c2ccdfa282783cf9a0a
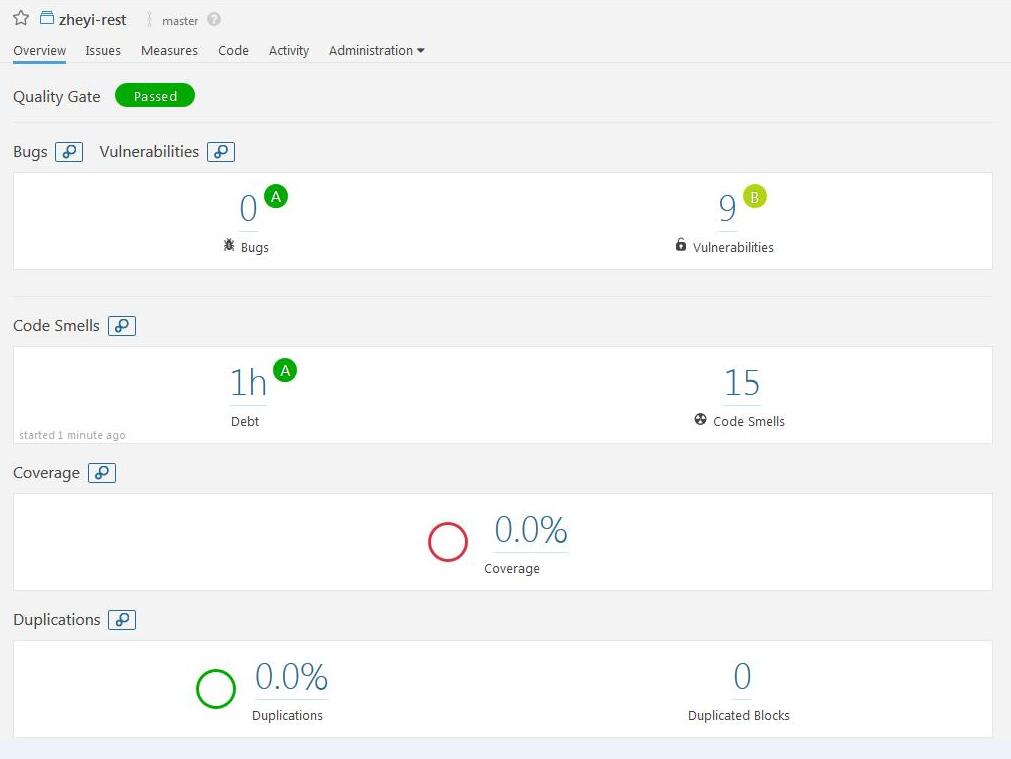
Verify
Centos下配置 Sonarqube+MySQL
SonarQube
Sonar 是一个用于代码质量管理的开放平台。通过插件机制,Sonar 可以集成不同的测试工具,代码分析工具,以及持续集成工具。比如pmd-cpd、checkstyle、findbugs、Jenkins。通过不同的插件对这些结果进行再加工处理,通过量化的方式度量代码质量的变化,从而可以方便地对不同规模和种类的工程进行代码质量管理。同时 Sonar 还对大量的持续集成工具提供了接口支持,可以很方便地在持续集成中使用 Sonar。
此外,Sonar 的插件还可以对 Java 以外的其他编程语言(支持的语言包括:Java、PHP、C#、C、Cobol、PL/SQL、Flex等)提供支持,对国际化以及报告文档化也有良好的支持。可以说Sonar是目前最强大的代码质量管理工具之一。
环境前提
- Centos 6.7
- JDK 1.8
- Mysql 5.6
安装
创建数据库及授权
1
2
3
4
5CREATE DATABASE sonar CHARACTER SET utf8 COLLATE utf8_general_ci;
CREATE USER 'sonar' IDENTIFIED BY 'sonar';
GRANT ALL ON sonar.* TO 'sonar'@'%' IDENTIFIED BY 'sonar';
GRANT ALL ON sonar.* TO 'sonar'@'localhost' IDENTIFIED BY 'sonar';
FLUSH PRIVILEGES;下载安装SonarQube
从官方下载Downloads,下载后放到/opt,解压ZIP文件。配置sonar.properties
1
2
3
4
5
6
7
8
9
10
11
12
13
14# User credentials.
# Permissions to create tables, indices and triggers must be granted to JDBC user.
# The schema must be created first.
sonar.jdbc.username=sonar
sonar.jdbc.password=sonar
#----- Embedded Database (default)
# H2 embedded database server listening port, defaults to 9092
#sonar.embeddedDatabase.port=9092
#----- MySQL 5.6 or greater
# Only InnoDB storage engine is supported (not myISAM).
# Only the bundled driver is supported. It can not be changed.
sonar.jdbc.url=jdbc:mysql://localhost:3306/sonar?useUnicode=true&characterEncoding=utf8&rewriteBatchedStatements=true&useConfigs=maxPerformance&useSSL=false启动SonarQube
用root无法启动SonarQube,需要另外新建普通用户来启动。创建sonar用户,并修改解压后的文件夹Own为sonar。
切换用户,执行:1
[sonar@Automation sonarqube-6.7.5]$ ./bin/linux-x86-64/sonar.sh start
启动失败,一直报DB链接错误,需要在MySQL的my.cnf修改
bind-address = localhost,重启Mysql,再重启SonarQube就可以了。验证
Browser打开http://192.168.220.132:9000/,如下页面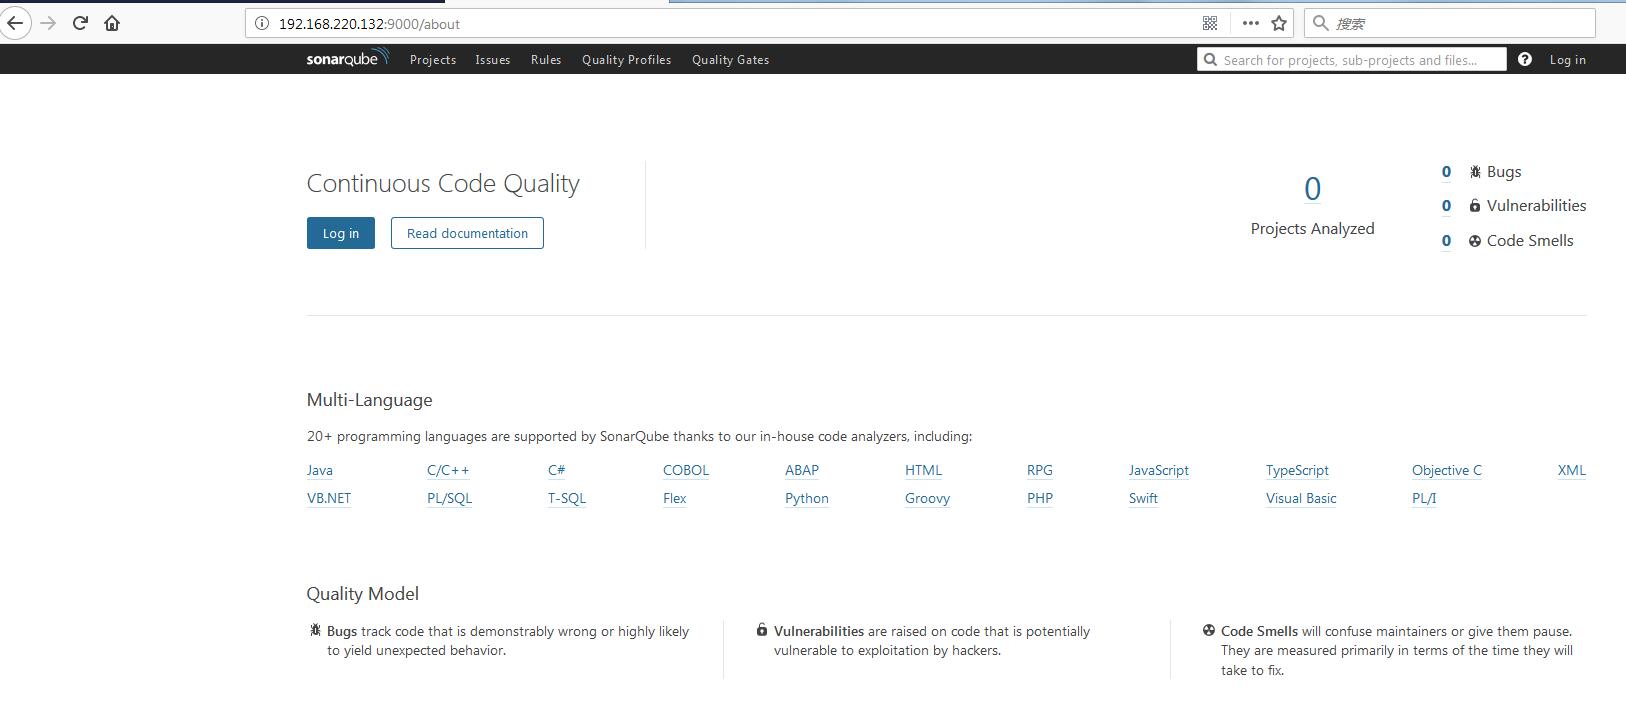


Centos下升级Mysql(5.1 -> 5.7)
安装软件需要版本更高的Mysql,就做了个升级。
如果担心数据丢失,可以先备份数据库。
1
mysqldump -u xxx -h xxx -P 3306 -p --all-databases > databases.sql
停止Mysql服务。
1
service mysqld stop
卸载旧版Mysql。
1
yum remove mysql mysql-*
移除命令执行后,可再看看是否有残余的mysql
1
yum list installed | grep mysql
如果有,删除:
1
yum remove mysql-libs
下载5.7版本的rpm文件。
1
rpm -Uvh http://repo.mysql.com/mysql57-community-release-el6-7.noarch.rpm
安装Mysql。
1
yum install mysql-community-server
验证。
1
2mysql -V
mysql Ver 14.14 Distrib 5.7.23, for Linux (x86_64) using EditLine wrapper
问题1:
Mysql服务启动失败,需要做初始化1
mysqld --initialize
遇到如下错误,1
2
32018-06-5T05:36:21.07069Z 0 [Warning] TIMESTAMP with implicit DEFAULT value is deprecated. Please use --explicit_defaults_for_timestamp server option (see documentation for more details).
2018-06-5T05:36:21.08821Z 0 [ERROR] --initialize specified but the data directory has files in it. Aborting.
2018-06-5T05:36:21.08870Z 0 [ERROR] Aborting
做如下操作:1
2rm -rf /var/lib/mysql
service mysqld start
问题2:
无法登录,1
2
3[root@Automation mysql]# mysql -u root -p
Enter password:
ERROR 1045 (28000): Access denied for user 'root'@'localhost' (using password: YES)
新版Mysql会设置默认密码,通过下面获得,1
2grep 'temporary password' /var/log/mysqld.log
2018-06-05T05:38:02.215252Z 1 [Note] A temporary password is generated for root@localhost: adwyZ;K=7Ub<
修改密码1
2
3
4
5
6
7
8
9
10
11
12
13
14
15
16
17
18
19
20
21
22
23
24
25
26
27
28
29
30
31
32
33
34
35
36
37
38
39
40[root@Automation mysql]# service mysqld stop
停止 mysqld: [确定]
[root@Automation mysql]# ps -ef | grep mysql
root 18570 11168 0 15:32 pts/3 00:00:00 grep mysql
[root@Automation mysql]# mysqld_safe --user=mysql --skip-grant-tables --skip-networking &
[1] 18571
2018-06-05T07:32:24.885303Z mysqld_safe Logging to '/var/log/mysqld.log'.
2018-06-05T07:32:24.928701Z mysqld_safe Starting mysqld daemon with databases from /var/lib/mysql
^C
[root@Automation mysql]# mysql -u root mysql
Reading table information for completion of table and column names
You can turn off this feature to get a quicker startup with -A
Welcome to the MySQL monitor. Commands end with ; or \g.
Your MySQL connection id is 2
Server version: 5.7.23 MySQL Community Server (GPL)
Copyright (c) 2000, 2018, Oracle and/or its affiliates. All rights reserved.
Oracle is a registered trademark of Oracle Corporation and/or its
affiliates. Other names may be trademarks of their respective
owners.
Type 'help;' or '\h' for help. Type '\c' to clear the current input statement.
mysql> update mysql.user set authentication_string=password('admin') where User='root';
Query OK, 1 row affected, 1 warning (0.01 sec)
Rows matched: 1 Changed: 1 Warnings: 1
mysql> flush privileges;
Query OK, 0 rows affected (0.00 sec)
mysql> update mysql.user set Host='%' where User='root';
Query OK, 1 row affected (0.00 sec)
Rows matched: 1 Changed: 1 Warnings: 0
mysql> flush privileges;
Query OK, 0 rows affected (0.00 sec)
mysql>
登录之后,还是不行,做如下操作:1
2
3
4
5
6
7
8
9
10
11
12
13
14
15
16
17
18
19
20
21
22
23
24
25
26
27
28
29[root@Automation mysql]# mysql -u root -p
Enter password:
Welcome to the MySQL monitor. Commands end with ; or \g.
Your MySQL connection id is 4
Server version: 5.7.23
Copyright (c) 2000, 2018, Oracle and/or its affiliates. All rights reserved.
Oracle is a registered trademark of Oracle Corporation and/or its
affiliates. Other names may be trademarks of their respective
owners.
Type 'help;' or '\h' for help. Type '\c' to clear the current input statement.
mysql> show databases;
ERROR 1820 (HY000): You must reset your password using ALTER USER statement before executing this statement.
mysql> ALTER USER 'root'@'%' IDENTIFIED BY 'admin';
Query OK, 0 rows affected (0.01 sec)
mysql> show databases;
+--------------------+
| Database |
+--------------------+
| information_schema |
| mysql |
| performance_schema |
| sys |
+--------------------+
4 rows in set (0.00 sec)
到此,Mysql升级完成。


nmon - 安装使用
开源性能监控工具,用于监控linux系统的资源消耗信息,并能把结果输出到文件中,然后通过nmon_analyser工具产生数据文件与图形化结果。
Nmon
- 下载相应OS版本,基于Centosnmon
- 上传到Server
/opt/nmon/ 解压,重命名,授权
1
2
3[root@Automation nmon]# tar -zxvf nmon16e_mpginc.tar.gz
[root@Automation nmon]# mv nmon_x86_64_centos6 nmon
[root@Automation nmon]# chmod 777 nmon验证
1
2
3
4
5
6
7
8
9
10
11
12
13
14
15
16
17
18
19
20
21[root@Automation nmon]# ./nmon
------------------------------ x
x _ __ _ __ ___ ___ _ __ For help type H or ... x
x | '_ \| '_ ` _ \ / _ \| '_ \ nmon -? - hint
x | | | | | | | | | (_) | | | | nmon -h - full details
x |_| |_|_| |_| |_|\___/|_| |_|
x To stop nmon type q to Quit
x ------------------------------ x
x LSB_VERSION=base-4.0-amd64:base-4.0-noarch:core-4.0-amd64:core-4.0-noarch:graphics-4.0-amd64:graphics-4.0-noarch:printing-4.0-amd64:printing-4.0-no x
xarcGenuineIntel Intel(R) Core(TM) i5-6300U CPU @ 2.40GHz
x MHz=2496.089 bogomips=4992.17
x ProcessorChips=1 PhyscalCores=1
x Hyperthreads =0 VirtualCPUs =2 x
x Use these keys to toggle statistics on/off:
x c = CPU l = CPU Long-term - = Faster screen updates
x C = " WideView U = Utilisation + = Slower screen updates
x m = Memory V = Virtual memory j = File Systems
x d = Disks n = Network . = only busy disks/procs
x r = Resource N = NFS h = more options
x k = Kernel t = Top-processes q = Quit
Nmon Analyser
下载和说明参见:nmon_analyser
数据采集并分析
采集
1
2
3
4
5
6
7
8
9
10
11
12
13
14
15
16
17
18
19
20
21
22
23[root@Automation nmon]# ./nmon --help
./nmon: invalid option -- '-'
Hint for nmon version 16e
Full Help Info : nmon -h
On-screen Stats: nmon
Data Collection: nmon -f [-s <seconds>] [-c <count>] [-t|-T]
Capacity Plan : nmon -x
Interactive-Mode:
Read the Welcome screen & at any time type: "h" for more help
Type "q" to exit nmon
For Data-Collect-Mode
-f Must be the first option on the line (switches off interactive mode)
Saves data to a CSV Spreadsheet format .nmon file in then local directory
Note: -f sets a defaults -s300 -c288 which you can then modify
Further Data Collection Options:
-s <seconds> time between data snapshots
-c <count> of snapshots before exiting
-t Includes Top Processes stats (-T also collects command arguments)
-x Capacity Planning=15 min snapshots for 1 day. (nmon -ft -s 900 -c 96)
---- End of Hints
[root@Automation nmon]# ./nmon -c 10 -s 2 -f -t分析
把第一步生成的采集文件,用analyser打开即可。
走进中国人民抗日战争纪念馆
应要求,做爱国主义教育,周末到抗日战争纪念馆,给孩子讲了一些知道的知识,也再次体会到了战争的残酷,和平的不易。
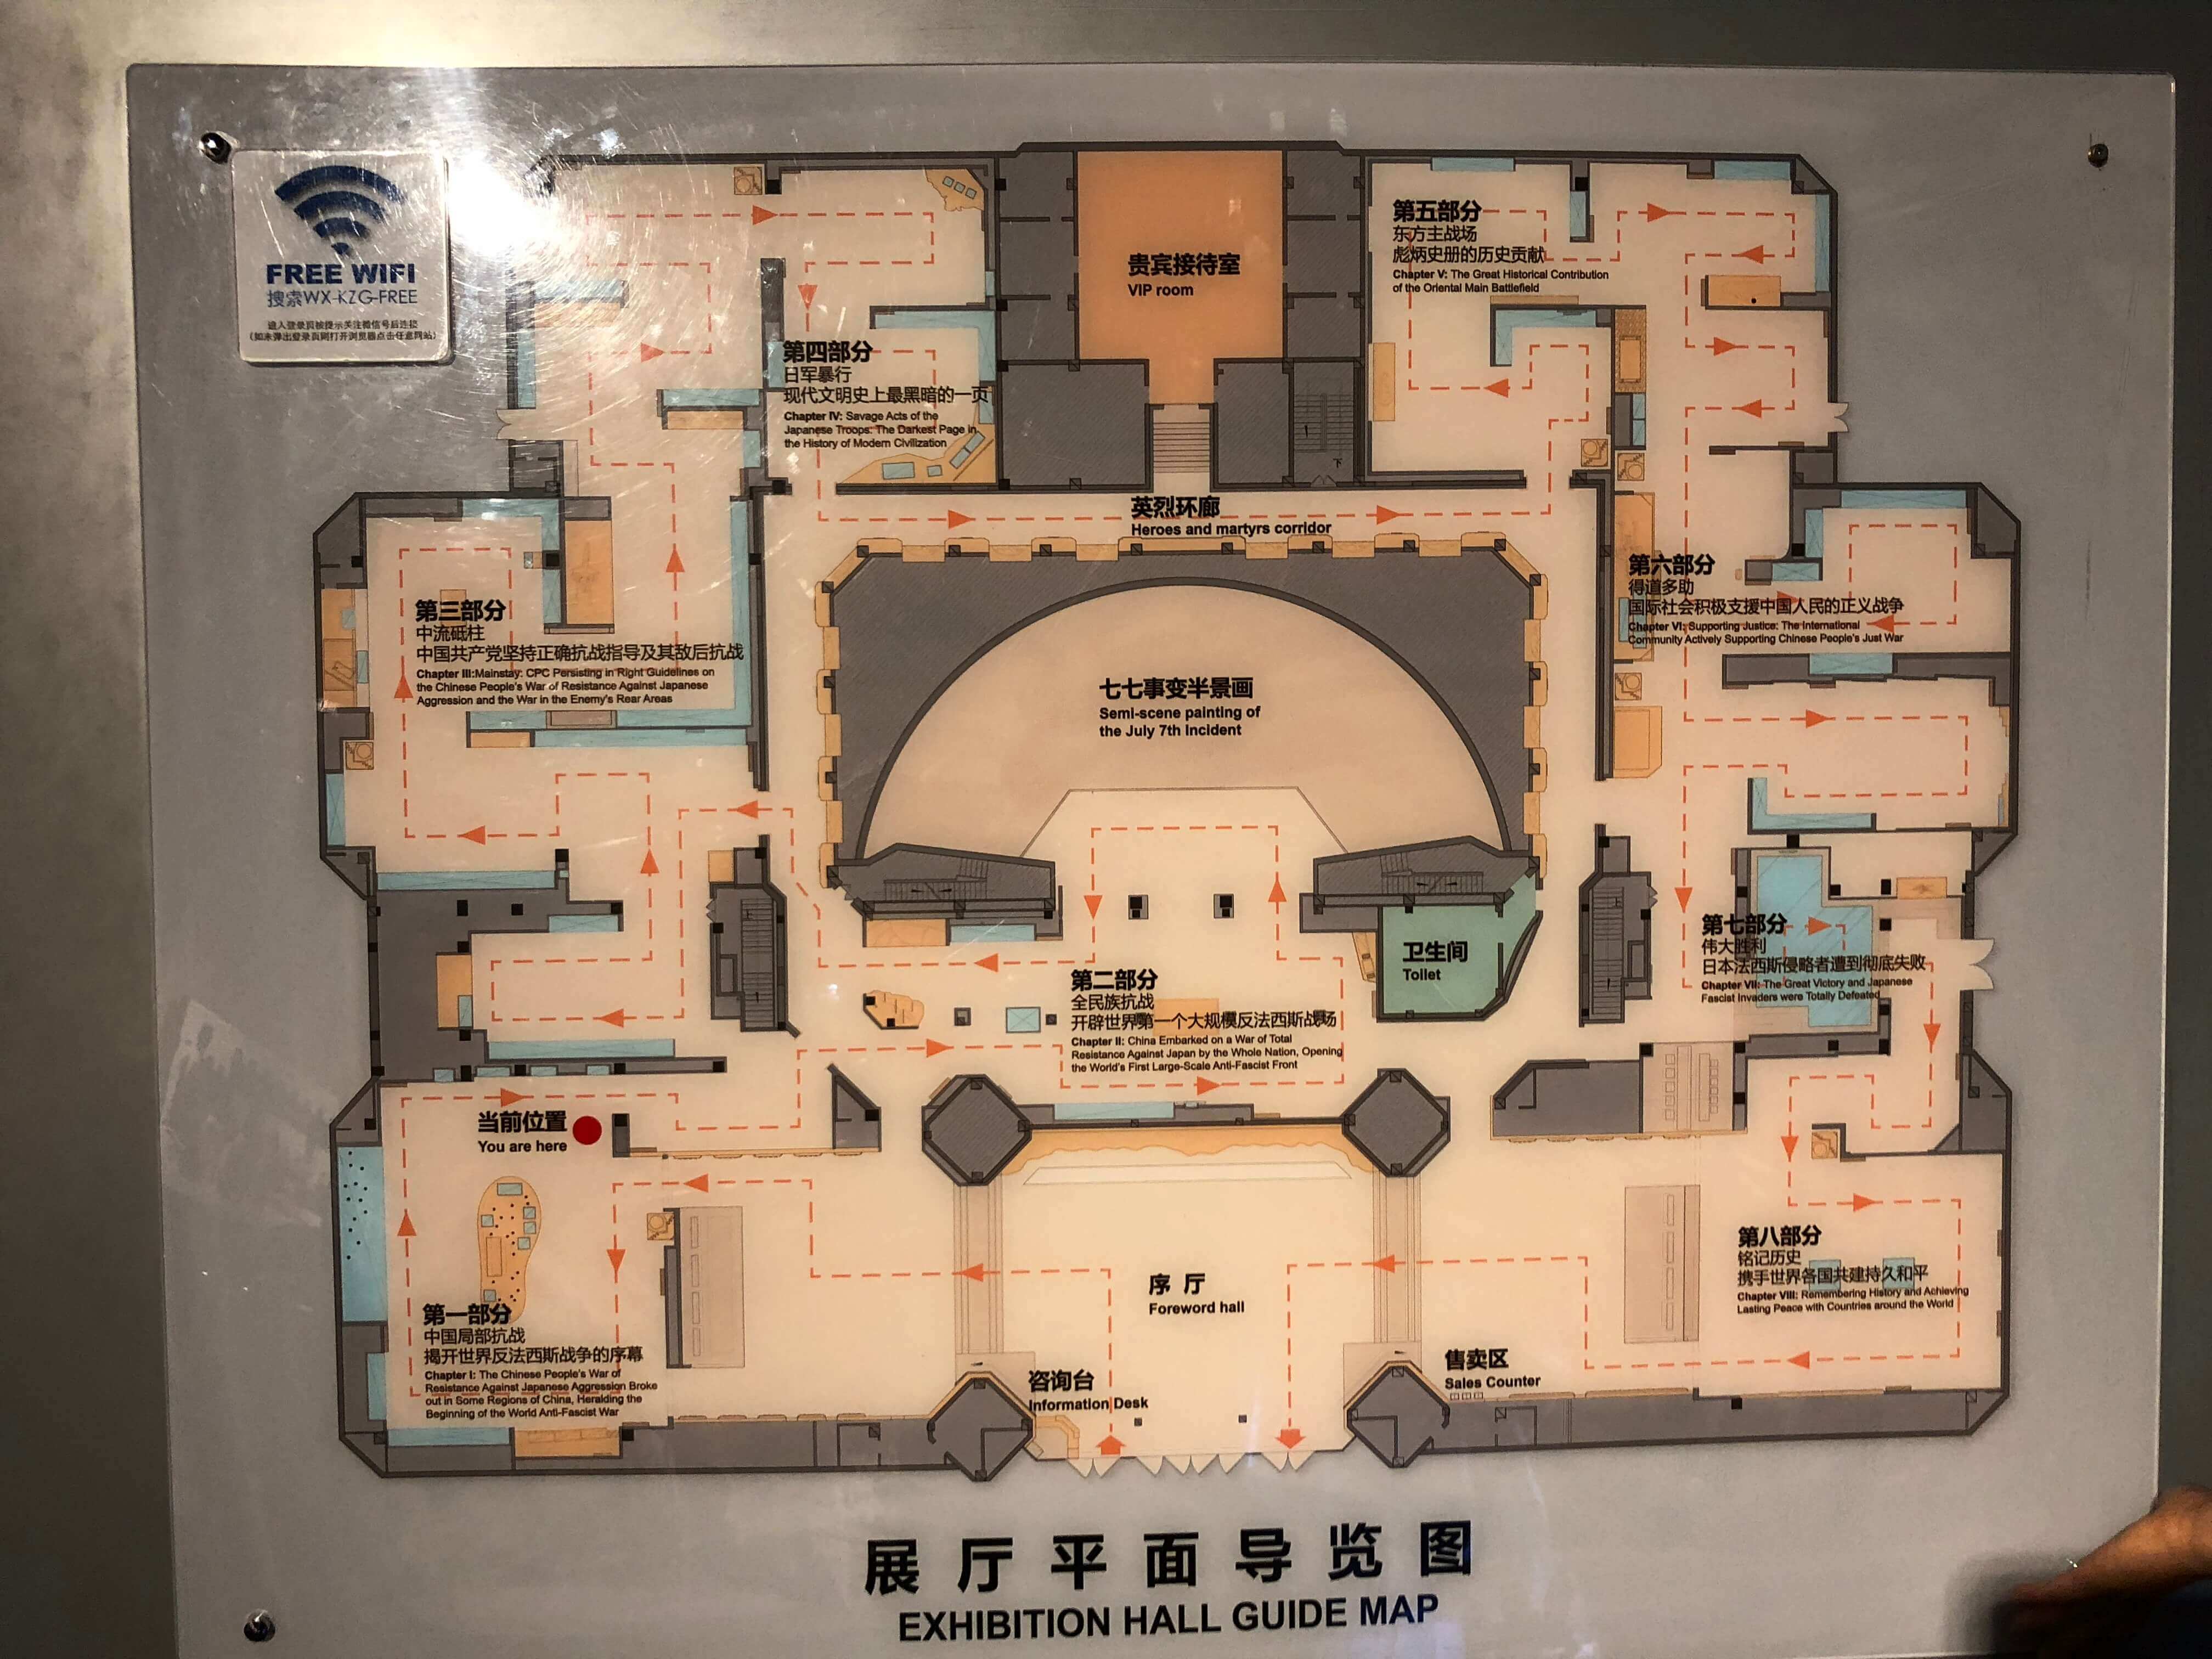


有一个抗战老兵的专题展,抗日英雄的过去和现状。95%的人都是回家务农,从图片就可以看出,现在过的应该很不易,到最后只剩一个棺材板,不知道还有没有人记得这些人的存在?不知道他们的内心有没有些许的牢骚和动摇?
还去了卢沟桥,20块票不值,爱国教育为什么还要收钱呢?出来的时候看很多人都是从出口进去的,也没人管。


Dubbo + ZooKeeper简单分布式搭建
用Dubbo和Zookeeper实现一个简单的分布式搭建。 代码上传 dubbo-zookeeper
实现理解
有两个项目:
- 服务提供者(dubbo-provider)
- 服务消费者(dubbo-consumer)
实现逻辑:
- 在
dubbo-provider实现一个服务,引入dubbo及相关配置,项目启动就会根据配置去Zookeeper注册一下,说明我实现这个服务,谁想用就可以来调用了。 - 在
dubbo-consumer也引入dubbo,配置好想调用的服务,启动就会告诉Zookeeper我会使用什么服务。
当dubbo-consumer想调用服务A时,就去问ZooKeeper,它就会把dubbo-provider中服务A的地址告诉dubbo-consumer,然后就根据地址去调用dubbo-provider的服务。
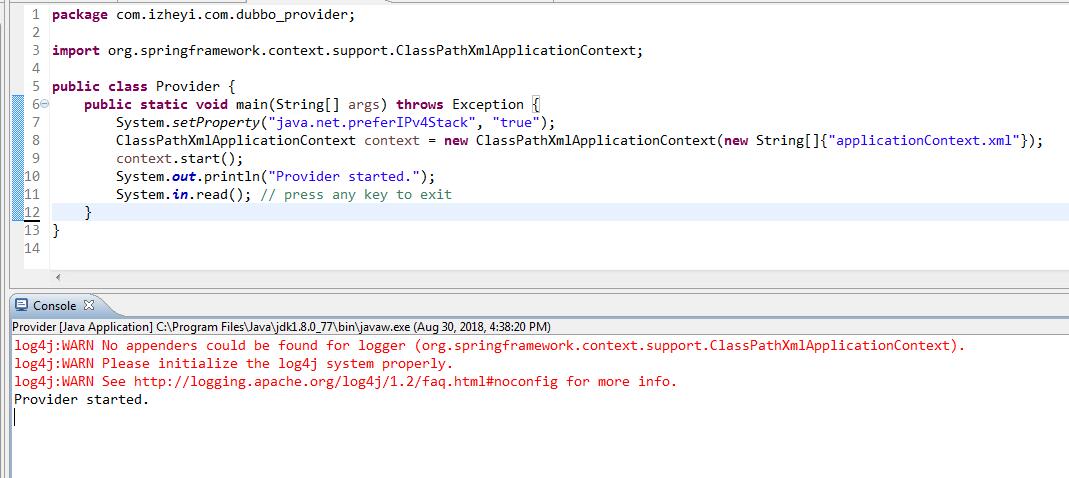
dubbo-provider
- 创建此工程,代码、依赖和配置请参见Github。
- 运行此工程。
- 检查ZooKeeper。
1
2
3
4
5
6
7
8
9ls /
[zk, dubbo, zookeeper]
[zk: localhost:2181(CONNECTED) 1] ls /dubbo
[com.izheyi.com.dubbo_provider.DubboService]
[zk: localhost:2181(CONNECTED) 2] ls /dubbo/com.izheyi.com.dubbo_provider.DubboService
[configurators, providers]
[zk: localhost:2181(CONNECTED) 6] ls /dubbo/com.izheyi.com.dubbo_provider.DubboService/providers
[dubbo%3A%2F%2F10.24.33.14%3A20880%2Fcom.izheyi.com.dubbo_provider.DubboService%3Fanyhost%3Dtrue%26application%3Ddubbo-provider%26dubbo%3D2.5.3%26interface%3Dcom.izheyi.com.dubbo_provider.DubboService%26methods%3DsayHello%26pid%3D22152%26side%3Dprovider%26timestamp%3D1535618301235]
[zk: localhost:2181(CONNECTED) 7]
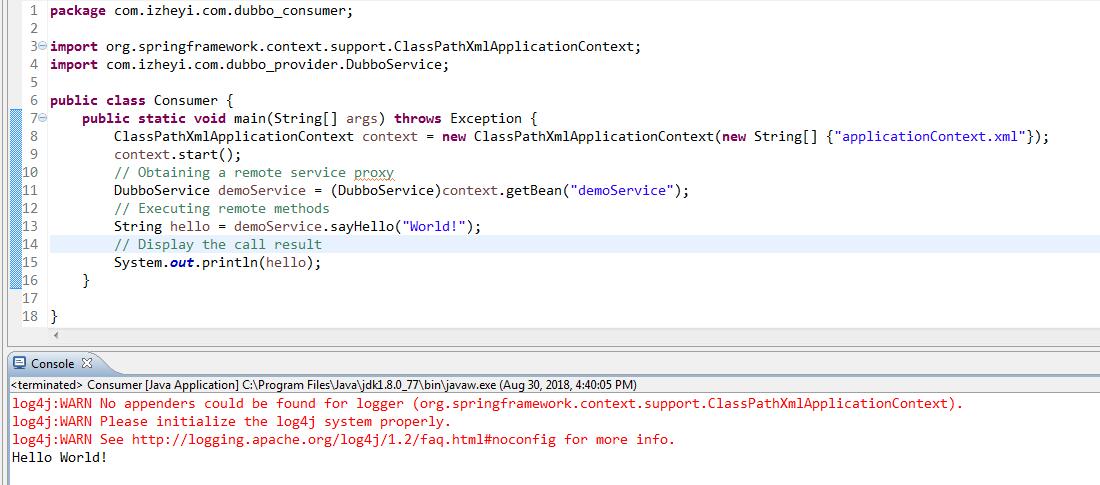
dubbo-consumer
- 创建此工程,代码、依赖和配置请参见Github。
- 运行此工程。