YONGFEIUALL

izheyi.com


  • Home

  • Archives

  • Categories

  • Tags

  • About

  • Search

FastAPI: 请求查询参数(3)

Posted on 2021-09-27 | In FastAPI |

声明不是路径参数的其他参数时,自动解释成查询参数,也就是位于 URL 的 ? 之后,并以 & 符号分隔的键值对的集合。

默认参数

1
2
3
4
5
users = [{'name': 'zhangsan'}, {'name': 'lisi'}, {'name': 'wangwu'}]

@app.get('/users/')
def root(start: int = 0, limit: int = 2):
return users[start : limit]

start=0 和 limit=2 的默认值,下面两种方式访问,结果是一样的

1
2
http://127.0.0.1:8000/users/
http://127.0.0.1:8000/users/?start=0&limit=2

必填参数

不声明默认值的参数就是默认参数。注意,有默认值参数和必填参数值都存在时,有默认值参数必须放到必填参数后边。

1
2
3
4
5
users = [{'name': 'zhangsan'}, {'name': 'lisi'}, {'name': 'wangwu'}]

@app.get('/users/')
def root(start: int, limit: int = 2):
return users[start : limit]

start是填参数,如果不写会报错。

1
2
3
http://127.0.0.1:8000/users/?limit=2

{"detail":[{"loc":["query","start"],"msg":"field required","type":"value_error.missing"}]}

可选参数

用Optional,默认值设置为 None 来声明可选参数

1
2
3
4
5
6
7
users = [{'name': 'zhangsan'}, {'name': 'lisi'}, {'name': 'wangwu'}]

@app.get('/users/')
def root(start: int = 0, limit: Optional[int] = None):
if limit:
return users[start : limit]
return users[start: ]

结果

1
2
3
http://127.0.0.1:8000/users/?start=0

[{"name":"zhangsan"},{"name":"lisi"},{"name":"wangwu"}]

路径和查询参数

1
2
3
4
5
6
7
books = [{'name': 'python'}, {'name': 'fastapi'}, {'name': 'java'}, ]

@app.get('/users/{id}')
def root(id: int, start: int = 0, limit: Optional[int] = None):
if limit:
return {id: books[start : limit]}
return {id: books[start: ]}

结果

1
2
3
4
5
http://127.0.0.1:8000/users/123
{"123":[{"name":"python"},{"name":"fastapi"},{"name":"java"}]}

http://127.0.0.1:8000/users/123?start=1
{"123":[{"name":"fastapi"},{"name":"java"}]}

FastAPI: 请求路径参数(2)

Posted on 2021-09-26 | In FastAPI |

路径参数(/users/{id})在项目中 不可避免的,如下:

基本操作

1
2
3
@app.get('/users/{id}')
def root(id: int): # 声明参数类型
return {'user_id': id}

id被声明为int类型,如果调用的时候不是int型,会报错。

1
2
3
4
5
6
http://127.0.0.1:8000/users/123
{"user_id":123}

# 数据校验
http://127.0.0.1:8000/users/a
"detail":[{"loc":["path","id"],"msg":"value is not a valid integer","type":"type_error.integer"}]}

注意函数接收(并返回)的值为 123,是一个 int 值,而不是字符串 "123"。FastAPI通过类型声明自动对请求进行转换。

路径查找顺序

路径操作是按顺序依次运行的,所以下面的代码就会有问题

1
2
3
4
5
6
7
@app.get('/users/{id}')
def root(id: int):
return {'user_id': id}

@app.get('/users/zhangsan')
def root():
return {'name': 'zhangsan'}

调用http://127.0.0.1:8000/users/zhangsan时,至上而下执行,/users/{id}会与 /users/zhangsan 相匹配,认为把zhangsan传给了 user_id

一定要确保路径的顺序的正确性。

预设参数

有时候想给参数设定一个有效的范围,FastAPI也是支持的。可以使用枚举来设定有效参数值。

1
2
3
4
5
6
7
8
9
10
class UserName(str, Enum):
n1 = 'zhangsan'
n2 = 'lisi'

@app.get('/users/{name}')
def root(name: UserName):
if name == UserName.n1:
return {'name': name}
if name.value == 'lisi':
return {'name': name}

只能传设定好的参数。

1
2
3
4
5
http://127.0.0.1:8000/users/zhangsan
{"name":"zhangsan"}

http://127.0.0.1:8000/users/wangwu
{"detail":[{"loc":["path","name"],"msg":"value is not a valid enumeration member; permitted: 'zhangsan', 'lisi'","type":"type_error.enum","ctx":{"enum_values":["zhangsan","lisi"]}}]}

FastAPI: 入门(1)

Posted on 2021-09-26 | In FastAPI |

FastAPI 是一个用于构建 API 的现代、快速(高性能)的 web 框架,使用 Python 3.6+ 并基于标准的 Python 类型提示。

安装

1
2
3
pip install fastapi

pip install uvicorn[standard]

示例

操作流程如下:

  1. 创建一个main.py,脚本如下

    1
    2
    3
    4
    5
    6
    7
    8
    9
    10
    11
    12
    13
    14
    15
    16
    # 导入 FastAPI
    from fastapi import FastAPI

    # 实例化 FastAPI
    app = FastAPI()

    # 创建一个路径
    '''
    @app.post()
    @app.put()
    @app.delete()
    '''

    @app.get('/')
    # 路径对应操作
    def root():
    return {'msg': 'hello world!'}
  2. 运行服务

    1
    E:\fastapi>uvicorn main:app --reload
  3. 验证

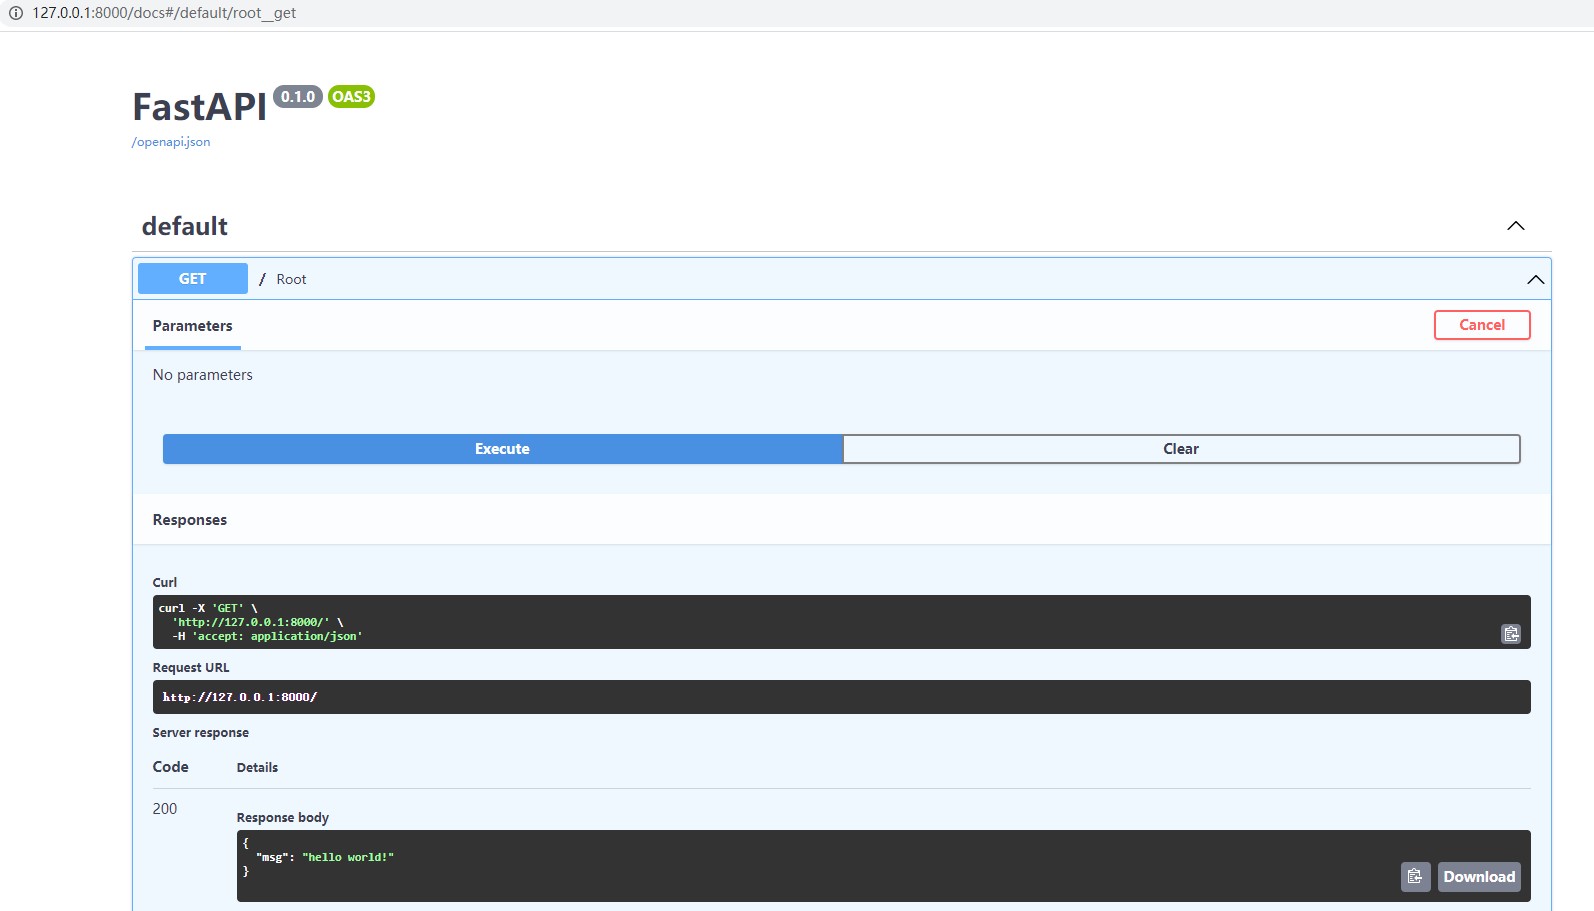
    打开浏览器访问 http://127.0.0.1:8000

    自动生成的交互式 API 文档 http://127.0.0.1:8000/docs

Packaging python packages with Poetry

Posted on 2021-09-23 | In Python |

Poetry is a tool for dependency management and packaging in Python. It allows you to declare the libraries your project depends on and it will manage (install/update) them for you.

Install

  1. Install with windows powershell

    1
    PS C:\Users> (Invoke-WebRequest -Uri https://raw.githubusercontent.com/python-poetry/poetry/master/get-poetry.py -UseBasicParsing).Content | python -
    Retrieving Poetry metadata
    
    This installer is deprecated. Poetry versions installed using this script will not be able to use 'self update' command to upgrade to 1.2.0a1 or later.
    # Welcome to Poetry!
    
    This will download and install the latest version of Poetry,
    a dependency and package manager for Python.
    
    It will add the `poetry` command to Poetry's bin directory, located at:
    
    %USERPROFILE%\.poetry\bin
    
    This path will then be added to your `PATH` environment variable by
    modifying the `HKEY_CURRENT_USER/Environment/PATH` registry key.
    
    You can uninstall at any time by executing this script with the --uninstall option,
    and these changes will be reverted.
    
    Installing version: 1.1.10
      - Downloading poetry-1.1.10-win32.tar.gz (41.47MB)
      
      
    Poetry (1.1.10) is installed now. Great!
    
    To get started you need Poetry's bin directory (%USERPROFILE%\.poetry\bin) in your `PATH`
    environment variable. Future applications will automatically have the
    correct environment, but you may need to restart your current shell.
  2. Verify

    1
    PS C:\Users> poetry --version
    Poetry version 1.1.10

Basic Usage

  1. Create a new project

    1
    PS E:\> poetry new jenkins-tool
    Created package jenkins_tool in jenkins-tool
    PS E:\> tree .\jenkins-tool\ /F
    文件夹 PATH 列表
    卷序列号为 4428-676B
    E:\JENKINS-TOOL
    │  pyproject.toml
    │  README.rst
    │
    ├─jenkins_tool
    │      __init__.py
    │
    └─tests
            test_jenkins_tool.py
            __init__.py
  1. Copy script to jenkins_tool/jenkins_tool

  2. Update pyproject.toml

    1
    [tool.poetry]
    name = "jenkins-tool"
    version = "0.1.0"
    description = "Manage Jenkins Job"
    authors = ["yongfeiuall <yongfeiuall@163.com>"]
    
    [tool.poetry.dependencies]
    python = "^3.6"
    python-jenkins="^1.7.0"
    
    [tool.poetry.dev-dependencies]
    
    [build-system]
    requires = ["poetry-core>=1.0.0"]
    build-backend = "poetry.core.masonry.api"
    
    [tool.poetry.scripts]
    jt = "jenkins_tool.client:main"
  3. Build

    1
    PS E:\jenkins-tool> poetry build
    Creating virtualenv jenkins-tool-vo3-Lls6-py3.6 in C:\Users\AppData\Local\pypoetry\Cache\virtualenvs
    Building jenkins-tool (0.1.0)
      - Building sdist
      - Built jenkins-tool-0.1.0.tar.gz
      - Building wheel
      - Built jenkins_tool-0.1.0-py3-none-any.whl

Verification

  1. Unzip jenkins-tool-0.1.0.tar.gz

  2. Install PS E:\jenkins-tool\dist\jenkins-tool-0.1.0> python .\setup.py install

  3. Verify

    1
    PS E:\jenkins-tool\dist\jenkins-tool-0.1.0> jt -h
    usage: jt [-h] [-v] [-V VIEW_NAME]
    
    Manage Jenkins Job
    
    optional arguments:
      -h, --help            show this help message and exit
      -v, --version         Show version
      -V VIEW_NAME, --view VIEW_NAME
                            Get Jenkins job last build number by view

remote: Support for password authentication was removed on August 13, 2021. Please use a personal access token instead.

Posted on 2021-09-15 | In Other |

I got this error on my console when i tried to push blog to github

1
remote: Support for password authentication was removed on August 13, 2021. Please use a personal access token instead.

Account passwords will no longer be accepted for authenticating Git operations.

You need to add a Personal Access Token instead, and you can follow the below method to add.

  1. Log in Github
  2. Go to User -> Settings -> Developer settings
  3. Click on Personal access tokens
  4. Config settings and Generate token
  5. Copy the token to replace username:password in hexo config.yml
  6. Push again

批量验证RackShift上物理机Web Console正确打开

Posted on 2021-09-15 | In Automation Testing |

最近云平台集成RackShift来批量管理近100台物理机,需要验证一下每台机器从界面能正确打开Console。手工就有点扯了,简单写了下边Selenium脚本来实现

  1. 到物理机列表面
  2. 选择每页100条显示
  3. 循环每台机器打开,并截图
  4. 检查截图显示是否正确
1
2
3
4
5
6
7
8
9
10
11
12
13
14
15
16
17
18
19
20
21
22
23
24
25
26
27
28
29
30
31
32
33
34
35
36
37
38
39
40
41
42
43
44
45
46
47
48
49
from selenium import webdriver
from selenium.webdriver.common.action_chains import ActionChains
from selenium.webdriver.common.keys import Keys
import time

URL = 'http://xxx/#/login'
driver = webdriver.Chrome()

# Open system
driver.get(url=URL)
driver.maximize_window()

# Login
driver.find_element_by_xpath('//*[@id="app"]/div/div/div[1]/form/div[5]/div[2]/div/div[1]/input').send_keys('admin')
driver.find_element_by_xpath('//*[@id="app"]/div/div/div[1]/form/div[5]/div[3]/div/div[1]/input').send_keys('admin')
driver.find_element_by_xpath('//*[@id="app"]/div/div/div[1]/form/div[6]/button').click()
time.sleep(2)

# Select page
driver.find_element_by_xpath('//*[@id="pane-bare-metal"]/div[3]/div/span[2]/div/div[1]/input').click()
time.sleep(2)
driver.find_element_by_xpath('//ul[@class="el-scrollbar__view el-select-dropdown__list"]/li[4]').click()

# Open console and capture
for i in range(1, 98):
ip = driver.find_element_by_xpath(f'//table[@class="el-table__body"]/tbody/tr[{i}]/td[4]/div').text

element = driver.find_element_by_xpath(f'//table[@class="el-table__body"]/tbody/tr[{i}]//button')
dropdown = element.get_attribute('aria-controls')

element.click()
time.sleep(2)

xpath = '//ul[@id="' + dropdown + '"]/li[4]'
driver.find_element_by_xpath(xpath).click()
time.sleep(2)

# capture
handles = driver.window_handles

driver.switch_to.window(handles[-1])
ActionChains(driver).send_keys(Keys.ENTER).perform()
time.sleep(2)
driver.get_screenshot_as_file(f'./image/{ip}.png')

driver.close()
driver.switch_to.window(handles[0])

driver.quit()

Command line to execute python script

Posted on 2021-08-22 | In Python |

We get jenkins job number here Jenkins

Use argparse to implement call python script.

1
2
3
4
5
6
7
8
9
10
11
12
13
14
15
16
17
18
parser = argparse.ArgumentParser(description='Manage Jenkins Job')
parser.add_argument('-v', '--version', action='store_true', help='Show version')
parser.add_argument('-V', '--view', dest='view_name', help='Get Jenkins job last build number by view')


args = parser.parse_args()

if len(sys.argv) == 1:
parser.print_help()
elif len(sys.argv) == 2:
if sys.argv[1] in ['-h', '--help']:
parser.print_help()
elif sys.argv[1] in ['-v', '--version']:
print(f'{__version__}')
elif len(sys.argv) == 3:
if sys.argv[1] in ['-V', '--view']:
print(args.view_name)
subprocess.call(f'python ./job_version.py {args.view_name}', shell=True)

Command run:

1
E:\ python .\cli.py
usage: cli.py [-h] [-v] [-V VIEW_NAME]

Manage Jenkins Job

optional arguments:
  -h, --help            show this help message and exit
  -v, --version         Show version
  -V VIEW_NAME, --view VIEW_NAME
                        Get Jenkins job last build number by view

Get job number:

1
PS E:\neolink_tools> python .\cli.py -V jenkins view name
{
    "a": 12,
    "b": 17,
    "c": 20,
    "d": 37
}

Jenkins pipeline with pytest and allure

Posted on 2021-08-05 | In Jenkins |

Use pipeline to better manage Jenkins job:

1
2
3
4
5
6
7
8
9
10
11
12
13
14
15
16
17
18
19
20
21
22
23
24
25
26
27
28
29
30
31
32
33
34
35
36
37
38
39
40
41
42
43
44
 pipeline {
agent {
label 'jenkins_master'
}

parameters {
string defaultValue: '/tests/', description: 'Set test suite', name: 'TestSuite', trim: true
choice choices: ['qa', 'dev', 'product'], description: 'Set test run env', name: 'Environment'
string defaultValue: '', description: 'Set tag to run', name: 'Tag', trim: true
string defaultValue: '2', description: 'Set rerun times when failed', name: 'Rerun', trim: true
string defaultValue: '1', description: 'Set multiple thread to run', name: 'Parallel', trim: true
}

stages {
stage('Get Automaiton Code') {
steps{
git credentialsId: 'xxxxxxx', url: 'https://xxx/api_automation.git'
}
}

stage('Run Automation') {
steps{
sh label: '', script: '''if [ ! $Tag ]; then

pytest -s -v ${WORKSPACE}${TestSuite} --reruns ${Rerun} -n ${Parallel} --alluredir=./report/json --clean-alluredir

else

pytest -s -v ${WORKSPACE}${TestSuite} -m ${Tag} --reruns ${Rerun} -n ${Parallel} --alluredir=./report/json --clean-alluredir

fi'''

}
}

}

post('Allure Report') {
always{
script{
allure includeProperties: false, jdk: '', report: 'report/html/', results: [[path: 'report/json']]
}
}
}
}

python get Jenkins job and build number info

Posted on 2021-07-30 | In Jenkins |

For multiple services Jenkins job, find a way to get each job and lasted build number for release static, here the way:

1
2
3
4
5
6
7
8
9
10
11
12
13
14
15
16
17
18
19
#!/usr/bin/env python
# -*- coding: utf-8 -*-

import jenkins
import json

# Login
s = jenkins.Jenkins(url=URL, username=USERNAME, password=PASSWORD)

# Get all jobs under certain view
jobs = s.get_jobs(view_name=VIEW_NAME)

# Get job and last build number
dic = {}
for job in jobs:
name = job['name']
build = s.get_job_info(name)['lastCompletedBuild']['number']
dic[name] = build
print(json.dumps(dic, indent=4))

Result:

1
2
3
4
5
6
{
"a": 12,
"b": 17,
"c": 20,
"d": 37
}

丁丁画画(四年级)

Posted on 2021-07-12 | In 丁丁 |

1234…40
唐胡璐

唐胡璐

i just wanna live while i am alive

393 posts
42 categories
74 tags
RSS
LinkedIn Weibo GitHub E-Mail
Creative Commons
© 2022 唐胡璐
Powered by Hexo
|
Theme — NexT.Pisces v5.1.4
79213 89409