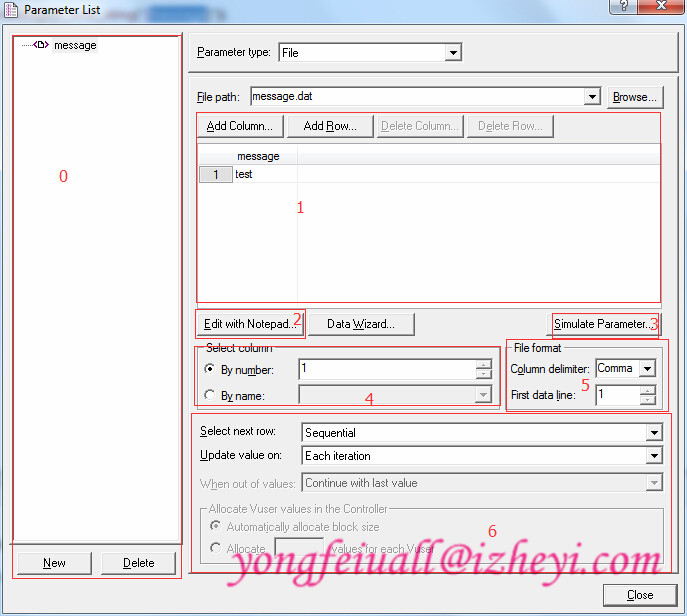
参数化的目的就是为了真实。
参数化步骤
实现步骤也很简单,双击选中要参数化的内容,右键 -> Replace with a Parameter;在替换的参数名处点右键,选择Replace more occurrences进行其他值替换。根据情况不同也可使用Ctrl+H替换。
例子:1
2
3
4
5Action()
{
lr_error_message("test");
return 0;
}
参数化后:1
2
3
4
5Action()
{
lr_error_message("{message}");
return 0;
}
但执行的结果:1
2
3Starting action Action.
Action.c(3): Error: {message}
Ending action Action.
lr_error_message只是原样输出双引号里的内容,并没有取出参数值的功能。那我们就要取出参数的值,传给相应函数。
The lr_eval_string function returns the input string after evaluating any embedded parameters.1
2
3
4
5Action()
{
lr_error_message(lr_eval_string("{message}"));
return 0;
}
再次执行结果:1
2
3Starting action Action.
Action.c(3): Error: test
Ending action Action.
多参数放在一个文件里
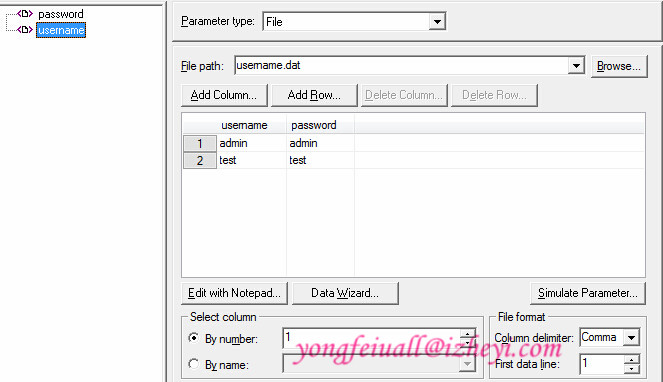
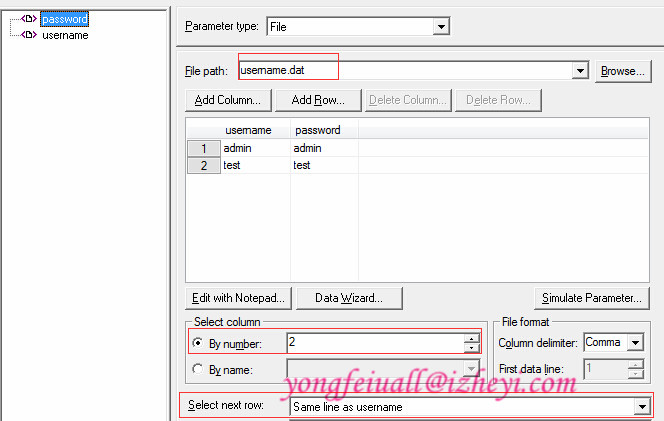
多数情况下,我们不可能把每个参数列表都放到单独的文件中。比如用户登录时的用户名和密码,正常情况下应该是放在一下文件里的。
实现步骤:
- 对username和password参数化;
- 在username参数列表里添加用户名和密码数据;

- 选中password参数,做相应修改;

Log日志跟踪
调试脚本想查看每次迭代时,运行的是哪行的参数,可做如下设置:
运行设置窗口,在Log -> extended log 选择1
2
3
4Starting action Action.
Action.c(3): Notify: Parameter Substitution: parameter "message" = "test1"
Action.c(3): Error: test1
Ending action Action.
以后做关联的时候,此处设置也能详细的显示出来关联信息,要知道的一点是写日志会对客户端造成压力,所以运行脚本的,不选择‘Extended Log’。


